|
|
- Login to your website by either clicking the Login Button, filling in the login form on the side bar or typing http://yourdomain/user into the address bar of your browser. This depends on how your website has been setup.
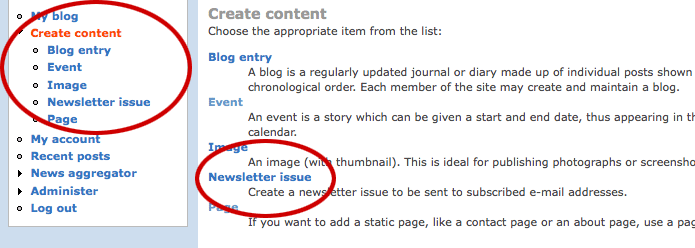
- Click on Create Content
- Depending on how your website is setup you will have different options. You can either create a Blog entry, Book Page, Event, Group, Image, Page, Newsletter. For purposes of this tutorial we are going to create a Newsletter.
- Click on Newsletter issue
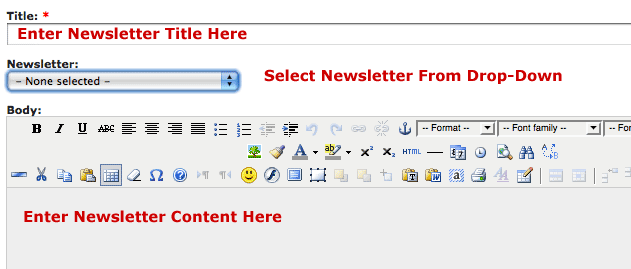
- Give your Newsletter a title.
- Under the Newsletter drop down select the newsletter group.
- In the body section create the content of your newsletter.
- Under Input format select Full HTML
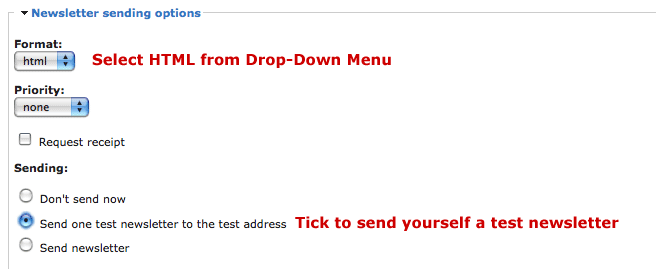
- Under Format select whether you would like to send a plain text email or an HTML newsletter. Plain text will not display images.
- You can set the priority of the email and request a receipt when your newsletter is read.
- Under sending you can postpone sending the newsletter, send a test and send the newsletter straight away.
- Comments is set to Disabled by Default - you can leave it like that.
- File attachments - if you would like to add a pdf document to download, you would browse and attached it here.
- URL path setting - Automatic Alias is checked by default - you can leave this like that.
- You can leave the authoring information as the default settings.
- Publishing Options - by default the published box is checked. If you would like the page promoted to the home page you would check this box too.
- You can then preview your page and submit it!
|
